Long before upcycling became trendy, musicians have been transforming everyday objects into musical instruments. From thumb pianos to cigar box guitars, these unique instruments have shaped the sounds of various musical cultures around the world.
And who can think of the Caribbean without hearing the lilting sound of a steel pan band playing a calypso while you sip a cocktail! We’ve always wondered how these iconic instruments are made, and if they really are made from old oil drums. The simple answer is… mostly, yes!
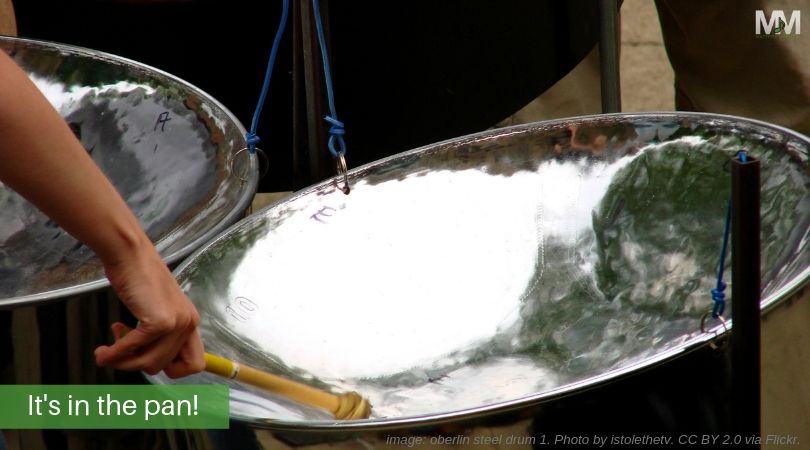
First, let’s start with a quick listen to the steel pan in action, as played by our own Matters Musical steel band. As the camera pans round (sorry!), look at the dents in the inside of the drum, marked with coloured dots. Each of these is a separate note.
From oil drum to steel band instrument
So, how does a discarded oil drum turn into a precisely tuned instrument? With a lot of hammering, and we mean, a LOT of hammering.
Step 1: Find your drum
Steel pans start life as a standard 55 gallon oil drum, made from 17 or 18 gauge steel. These drums are cleaned and checked for faults before the best are chosen for use.
Step 2: Sinking
The flat bottom of the oil drum is robustly hammered into a concave shape using a heavy hammer. In some part of the Caribbean a shot-put or a 5kg heavy cast iron ball (cannon balls!) is used instead, which is bounced onto the surface. This process, known as sinking, stretches the steel and creates the surface for the notes. This surface is now completely below the rim of the oil drum.
Step 3: Cutting
The lower section of the drum is cut off. How much is cut off determines the pitch of the steel pan. If you leave more ‘skirt’ in the drum, it has a lower pitch. Less skirt, the higher the individual pan voices can be. (This can also be done after the grooving process in Step 7.)
Step 4: Smoothing
The hammer comes out again, to smooth out the concave surface un a process rather like taking dents out of car doors (panel beating). This second round of hammering further strengthens the drum.
Step 5: Etching
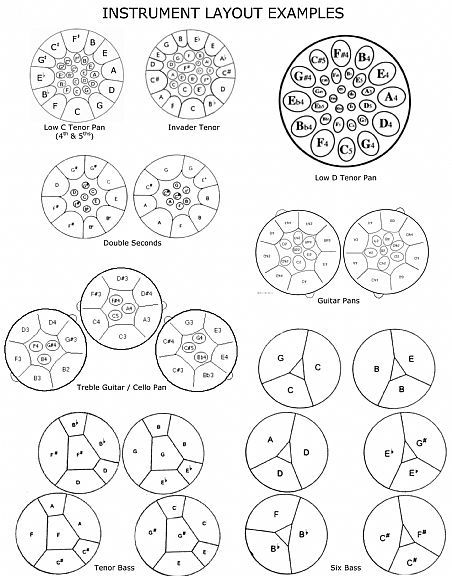
The individual notes need to be etched onto the playing surface so each one can be pitched. This is done using a punch tool, some pre-cut shapes as according to which note is being created, and a template of where each note should be positioned. Each pitch of pan (tenor, baritone, etc) has its own template. These can be simple or complex – see the Pinterest image below!
 https://www.pinterest.co.uk/pin/546272629796307279/?lp=true
Step 6: Countersinking
The area between each note is carefully flattened using (you guessed it) precision hammers. The result is that each note protrudes slightly as a ‘bulge’, making it easier to hit when playing.
Step 7: Grooving
Using a nail punch, indentations are gently hammered around each note to create an outline. The idea is that this outline separates each note from one another, and stops them blends together. However, given that we’re still dealing with one big piece of steel, some steel pan tuners think this process just makes the pan look nicer!
Step 8: Firing and tempering
The steel in the drum still needs to be tempered. Sop it is heated rapidly and then cooled by pouring water over it or leaving it to cool in a gentle Caribbean breeze. This process removes what is known as ‘local’ tensions, where some steel sections are stretched more than other sections. This process ‘evens out’ the stresses, making the pan much easier to tune.
Step 9: Tuning
Turning a dented oil drum into a finely tuned instrument is an art form in itself. As one website says:
“This is where the builder finds out if this particular Pan will become a sweet sounding musical instrument or a very unique looking backyard barbeque or goat feeder!”
Small hammers (natch) are used to shape each note from above and below to achieve the correct pitch. Here’s a demo of a steel drum tuner in action, using a strobe tuner to check each pitch once he’s tuned it by ear.
Step 10: Cleaning and polishing
Now it’s in tune, each steel drum is cleaned and polished. It can also be painted, chrome-plated or powder coated to give it a protective layer and attractive finish.
Step 11: Final tuning
A final tune is required to ensure every note is perfect. It’s a process not to be rushed, as each time one note is tweaked, it will inevitably affect the others around it.
Step 12: Blending
If you’re playing in a steel band, you’ll want all the steep pans to blend together for that mellow vibe and sympathetic harmonics. Blending and tuning is not a one-off, as any steel pan drum needs retuning and blending over its lifespan.
Steel bands for your event
Now you know how they are made, book a steel band to play at your next event! Steel bands bring musical joy, laughter and infectious rhythms to any event, from a simple setup for a shopping experience to a full Caribbean steel band for a corporate event.
Call us with your requirements, and we’ll point you to the steel pan band that’s pitch perfect for your event. Or, grab a rum punch and check out all our Caribbean bands and acts here at Matters Musical: